The DeWALT DW718 Manual provides essential information for users of this versatile miter saw, covering aspects from setup and operation to maintenance and safety precautions. This comprehensive guide is designed to help both novice and experienced users maximize the performance of the DW718. With detailed instructions, troubleshooting tips, and maintenance guidelines, the manual ensures that users can confidently handle a range of cutting tasks while maintaining the saw’s longevity and efficiency. Accessing this manual is key to unlocking the full potential of your DeWALT DW718 miter saw.# INSTRUCTION MANUAL
DeWALT DW718 Manual
Definitions: Safety Guidelines
The definitions below describe the level of severity for each signal word. Please read the manual and pay attention to these symbols.
- DANGER: Indicates an imminently hazardous situation which, if not avoided, will result in death or serious injury.
- WARNING: Indicates a potentially hazardous situation which, if not avoided, could result in death or serious injury.
- CAUTION: Indicates a potentially hazardous situation which, if not avoided, may result in minor or moderate injury.
- NOTICE: Indicates a practice not related to personal injury which, if not avoided, may result in property damage.
IMPORTANT SAFETY INSTRUCTIONS
WARNING: Read all instructions before operating product. Failure to follow all instructions may result in electric shock, fire and/or serious injury.
Double Insulation
Double insulated tools are constructed throughout with two separate layers of electrical insulation on the double thickness of insulation between you and the tool’s electrical system. Tools built with this insulation are not intended to be grounded.
Polarized Plugs
To reduce the risk of electric shock, this plug is intended to be used in a polarized outlet. If provided, this plug will fit in the polarized outlet only one way. If the plug does not fit, reverse the plug. If it still does not fit, contact a qualified electrician to replace the obsolete outlet. Do not change the plug in any way.
Safety Instructions For All Tools
This timer saw switch is designed to reduce the risk of all injury.
- KEEP GUARD IN PLACE AND WORKING.
- REMOVE ADJUSTING KEYS AND WRENCHES. Form habit of checking to be sure keys and adjusting wrenches are removed from spindle before turning on tool. Tools, scraps, pieces, and other debris can be thrown at high speeds, causing injury.
- MAKE WORKSHOP CHILDPROOF with padlocks, master switches, or by removing starter keys. The unauthorized startup of a machine by a child or visitor may result in injury.
- DON'T FORCE TOOL. It will do the job better and safer at the rate for which it was designed.
- USE RIGHT TOOL. Don't force tool or attachment to do a job for which it was not designed.
- USE PROPER CLOTHING. Loose clothing, gloves, neckties, rings, bracelets, or other jewelry can get caught in moving parts. Non-slip footwear is recommended.
- USE SAFETY GLASSES. Everyday eyeglasses are not safety glasses. ANSI Z87.1 (ANSI 234.3)
- ANSI 1216.2 (9-13) hearing protection.
Additional Safety Rules For Miter Saws
WARNING: Read and understand all instructions before operating this tool. Always remember that a careless fraction of a second is sufficient to inflict severe injury.
- OBTAIN ADVICE: From your supervisor, instructor, or another qualified person if you are not thoroughly familiar with the operation of this machine. Know your limitations and heed them.
- KEEP HANDS AWAY: From the blade.
- ALWAYS USE A SHARP BLADE.
- DO NOT PERFORM ANYTHING OTHER THAN THE DESIGNATED OPERATION.
- DO NOT WEDGE ANYTHING.
- NEVER LEAVE UNATTENDED.
- NEVER REACH AROUND OR BEHIND THE SAW.
- SECURE THE MATERIAL TO A STABLE SUPPORT.
- INSPECT BLADE FOR CRACKS OR BREAKS.
- CLEAN THE BLADE AND BLADE CLAMPS.
- CLEAN THE MOTOR AIR SLOTS of chips and sawdust.
- KEEP ARMS, HANDS, AND FINGERS AWAY from the cutting area.
- TURN OFF THE MACHINE.
For additional information regarding the safe and proper use of power tools, please contact the REFERENCE SERVICES, National Consumer Product Safety Commission, 4330 East-West Highway, Suite 130, Bethesda, MD 20814.
Safety Instructions
WARNING: Do not connect unit to electrical power source until complete instructions are read and understood.
WARNING: Always wear proper personal hearing protection that conforms to ANSI S12.6 (S3.19) standards. Under some conditions and duration of use, noise from this product may contribute to hearing loss.
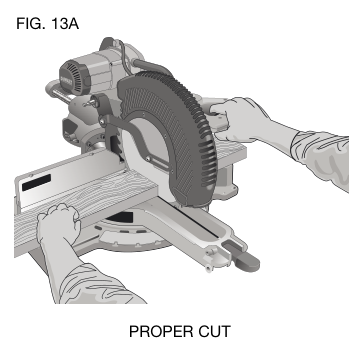
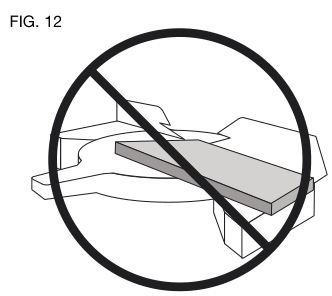
WARNING: NEVER MAKE ANY CUT UNLESS THE MATERIAL IS SECURED ON THE TABLE AND AGAINST THE FENCE.
WARNING: Some dust created by power sanding, sawing, grinding, drilling, and other construction activities contains chemicals known to cause cancer, birth defects or other reproductive harm. Some examples of these chemicals are:
- crystalline silica from bricks and cement and other masonry products, and
- arsenic and chromium from chemically-treated lumber (CCA).
To reduce your exposure, wear approved safety equipment, such as those masks that are specifically designed to filter out microscopic particles.
WARNING: When operating this tool, always observe these safety rules:
- Avoid accidental contact with the saw.
- Wear appropriate clothing and wash exposed areas with soap and water.
- Disconnect the power supply before servicing.
Electrical Connection
Be sure your power supply agrees with the nameplate marking, 120 volts AC, means that your saw will operate on alternating current. The switch is susceptible to failure if direct current is used. A voltage decrease of 10 percent or more will cause a loss of power and overheating. All DEWALT tools are factory tested. If this tool does not operate, check the power supply.
Accessories
WARNING: Since accessories, other than those offered by DEWALT, have not been tested with this product, DEWALT cannot warranty the products and will not be responsible for any injuries.
- If you need assistance in locating any accessory for your tool, please call 1-800-4-DEWALT (1-800-433-9258) or visit www.dewalt.com.
Optional Accessories
Select for use with your saw, may be helpful. Some cases, other locally available accessories, clamps, etc., may be more appropriate. User can select using accessories.
- Laser Guide: Designed to fit the DW701 Serives and your home improvement retailer; instructions for installation are included with the accessory. Read and follow all instructions for safe installation use.
- Extension: Saw model: DW7080.
- Adjustable Table Support: Model: DWDW501 (similar model included).

Requires the use of one work support (see drawing). It is used to make repetitive cuts of the same length from 10" to 42" (or 27 cm).

Used for firmly clamping workpiece to the saw table for precision cutting.
- Dust Bag: Model: DW703 (fits some models).
Equipped with a zipper for easy emptying, the dust bag will capture the majority of the sawdust produced.
- Miter Saw LED Worklight System: DW57085
- Provides great visibility and directs alignment during operation. Easy to install.
- Always use 12" (305 mm) SAW BLADES WITH 1" (25.4 mm) ARBOR HOLES. SPEED RATING MUST BE AT LEAST 4800 RPM. Never use a smaller diameter blade.

Blade Descriptions
| Application | Diameter | Teeth |
|---|---|---|
| Construction Saw Blades (drop saw with anti-kick back) | 12" (305 mm) | 40 |
| General Purpose | 12" (305 mm) | 40 |
| Fine Crosscuts | 12" (305 mm) | 60 |
| Woodworking Saw Blades (groove cuts) | 12" (305 mm) | 80 |
| Fine Crosscuts | 12" (305 mm) | 80 |
| For non-ferrous metals | 12" (305 mm) | 60 |
| Note: TCG teeth designed for this purpose. | ||
Unpacking Your Saw
Check the contents of your miter saw carton to make sure that you have received all parts. In addition to this instruction manual, the carton should contain:
- One DW712T (12" 305 mm) compound miter saw blade.
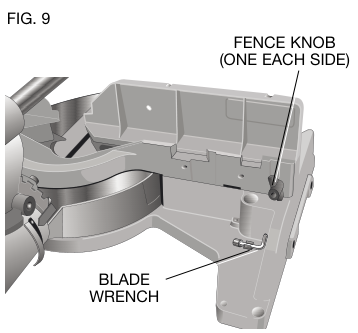
- One blade wrench (inside the pocket shown in Figure).
- One DW7053 clamp (some models).
- One material clamp.
Specifications
- Capacity of Cut
- 50° right miter, 60° left miter
- 0° miter
- 45° miter
- Max. Height 3.7" (94 mm)
- Max. Width 13.6" (345 mm)
- Result: Width 12.9" (328 mm), Height 2.9" (74 mm)

- [image]{001-img-005} | The diagram of the parts at the end provides a clearer understanding of the structure.
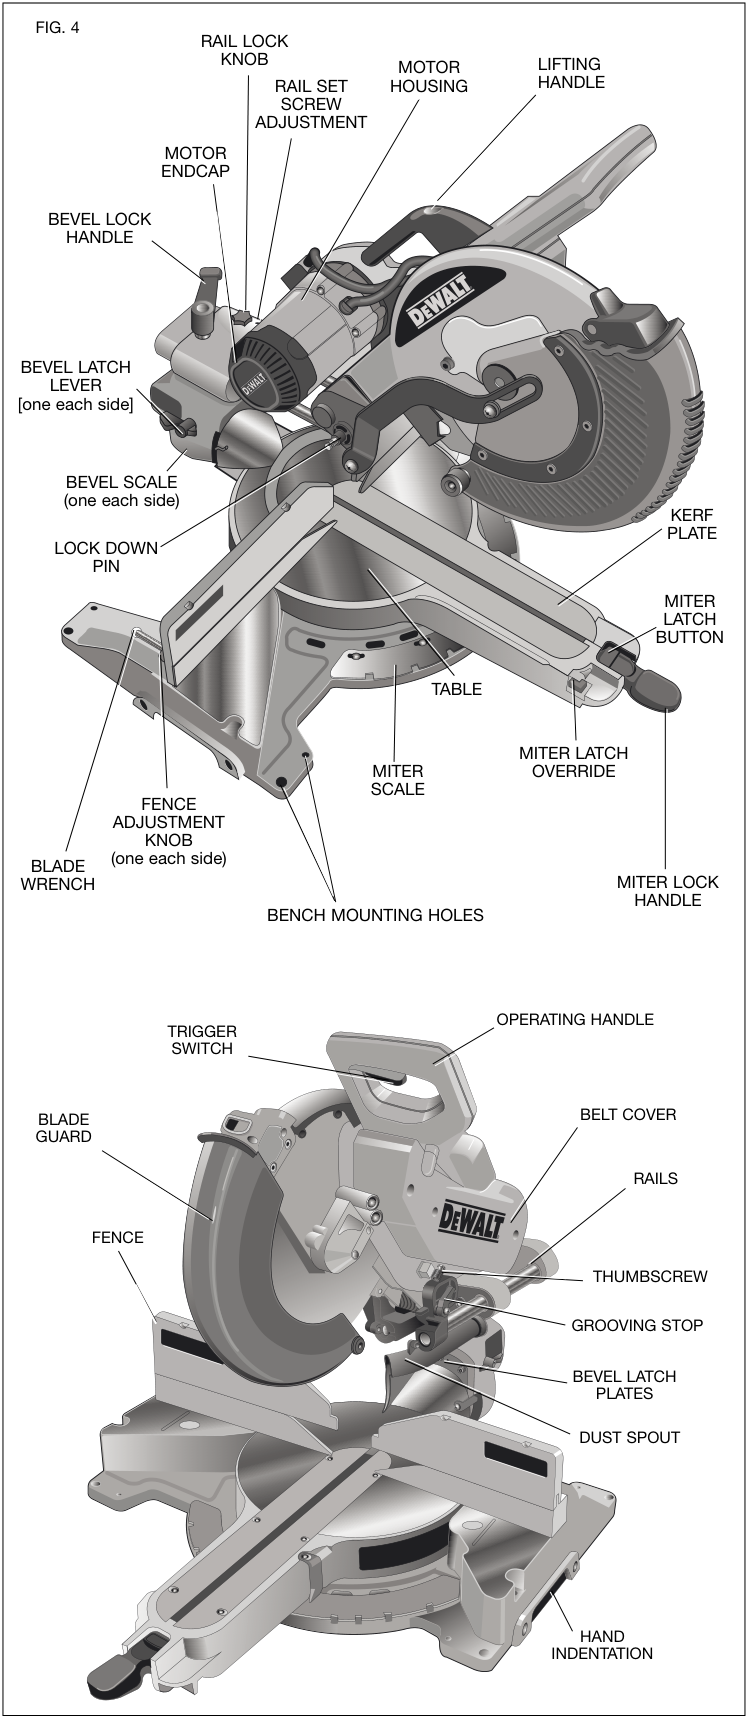
Familiarization
Your miter saw is fully assembled in the carton. Open the box and lift the saw out by the convenient carrying handle.
Drive
- Voltage: 120 Volt
- Amp: 15 Amp Motor
- No Load RPM: 3600 RPM
- Belt: Multi-V Belt
- Bearings: Ball Bearings
- Blade: Carbide Blade
- Automatic Electric Brake
Bench Mounting
Holes are provided in all 4 feet to facilitate bench mounting.
WARNING:
- Ensure the mounting holes are located properly.
- The saw must be level to prevent tipping or binding.
Important Safety Instructions
Changing or Installing a New Saw Blade
- Unplug the saw.
- Raise the saw to the upper position and raise the blade guard as far as possible.
- Loosen, but do not remove guard bracket screw.
- Depress the spindle lock while carefully rotating the saw blade by hand until the lock engages.
- Remove the blade screw.
- Install the new blade following the reverse procedure.
NOTE: For blades with a blade hole of 5/8” (15.88 mm), use (1) 1” (25.4 mm) blade adapter if not used.
Adjustments
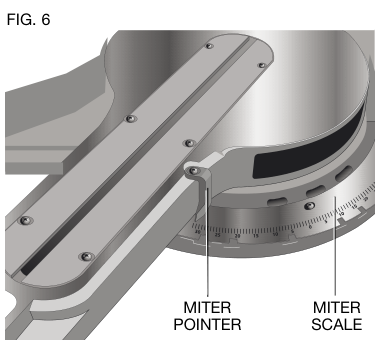
Miter Scale Adjustment Place a square against the saw’s fence and blade.
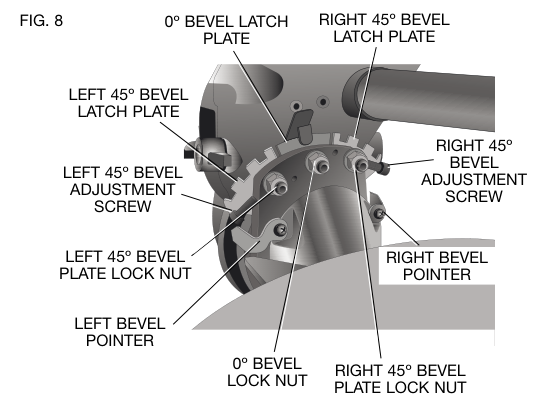
Bevel Square to Table Adjustment Align the blade square to the table, and check the alignment.
Transporting the Saw
WARNING:
- Always unplug the tool before transporting.
- Use the carrying handles for safer transport.
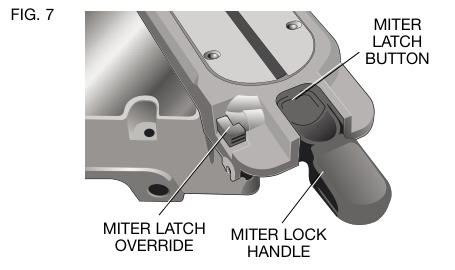
OPERATION
WARNING: To reduce the risk of serious personal injury, turn off the tool and disconnect it from the power source before attempting to move it, change accessories or make any adjustments except as written in laser adjustment instructions.
USER MANUAL
Plug the saw into any household 60 Hz power source. Refer to the nameplate for voltage. Be sure the cord will not interfere with your work.
TO SWITCH
To turn the saw on, depress the trigger switch. To turn off, release the switch. Allow the blade to come to a full stop before placing the tool down.
SETTING UP YOUR SAW
If the slide feature is not used, ensure the saw head is pushed back as far as possible and the lock knob is tightened. This will prevent the saw from sliding as it raises the workpiece to the saw.
CROSSCUTS
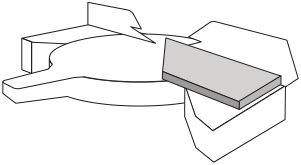
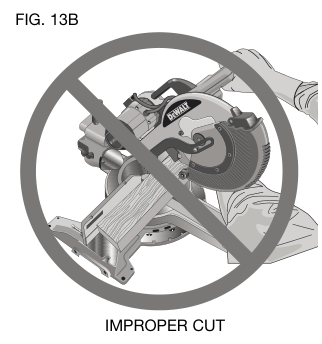
Cutting off mobile pieces is not recommended as doing so will ensure that each piece is held firmly against the table and fence.
Ensure material does not creep while cutting, clamp it securely in place.
If small fibers of wood still split out at the rear of the workspace, stick a piece of masking tape on the wood where the cut will be made.
QUALITY OF CUT
The quality of the cut can depend on various factors including blade material, setup, and how the saw is used.
BLADE INSTALLATION
- Install the blade behind the fence. The clamp should be facing toward the back of the saw.
- Rotate the clamp “180” toward the front of the miter saw.
- Loosen the knob to slide the blade assembly back and forth.
CLAMPING
While making a cut, clamp the workpiece and ensure it does not move.
SAW BLADES
For the best cutting capabilities, refer to the list of recommended saw blades for your saw and select one that fits your needs.
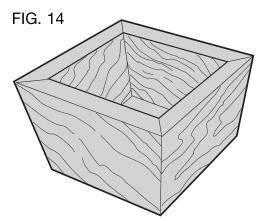
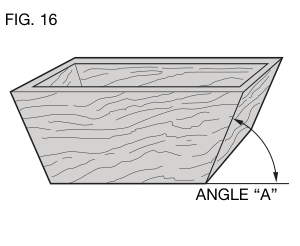
CUTTING PICTURE FRAMES, SHADOW BOXES AND OTHER FOUR-SIDED PROJECTS
Your saw is perfect for cutting bevels and miters.
CUTTING CROWN MOLDING
To cut molding, adjust the miter angle and use appropriate settings.
IMPORTANT
- Follow the provided instructions closely.
- Ensure all settings are right before making cuts.
PRESETTING WITH SCRAP MATERIAL
Always make cuts from a scrap piece before moving on to the final piece.
BEVEL SETTING
TYPE OF CUT
- RIGHT SIDE, INSIDE CORNER
- Top of molding against fence.
- Saw blade set at 31.62°
- LEFT SIDE, OUTSIDE CORNER
- Top of molding against fence.
- Saw blade set at 31.62°
- LEFT SIDE, INSIDE CORNER
- Top of molding against fence.
- Saw blade set at 31.62°
- RIGHT SIDE, OUTSIDE CORNER
- Top of molding against fence.
- Saw blade set at 31.62°
When setting bevel and miter angles for corners, remember that: The angles presented for crown molding are very precise and difficult to set exactly. Since they can easily shift and only moldings have nearly square corners, all settings should be tested on scrap molding.
PRETESTING WITH SCRAP MATERIAL IS EXTREMELY IMPORTANT
ALTERNATIVE METHOD FOR CUTTING CROWN MOLDING
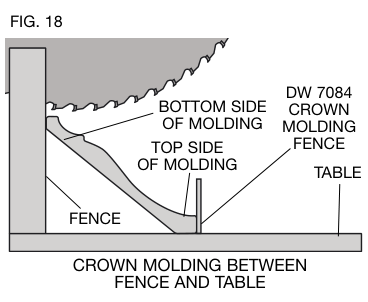
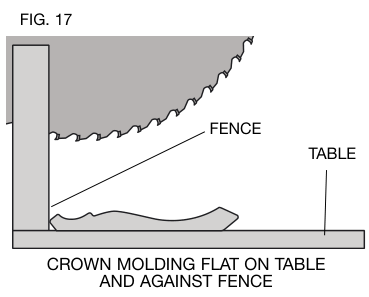
Place the molding on the table at an angle between the fence and the saw table, as shown in Figure 18. Use of the crown molding needle accessory (DW7048) is highly recommended for aiming and ensures precision and convenience. The crown molding fence accessory is available for purchase from your local dealer.
The advantage to cutting crown molding using this method is that no bevel cut is required. Minute changes in the angle can be made while affecting the bevel angles. Thus, when corners other than 90° are encountered, the saw can be quickly and easily adjusted for them. Use the crown molding knife accessory to maintain the cut angle at which the molding will rest on the wall.
SPECIAL CUTS
NEVER MAKE ANY CUT UNLESS THE MATERIAL IS SECURED ON THE TABLE AND AGAINST THE FENCE.
ALUMINUM CUTTING
ALWAYS USE THE APPROPRIATE SAW BLADE ESPECIALLY FOR CUTTING ALUMINUM. These are available at your local DEWALT retailer or DEWALT service center. For your convenience, use this chart to select the correct type of a cutting blade for different jobs.
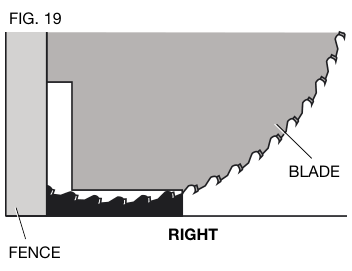
- Make a platform using a piece of 1.5” (38 mm) thick plywood or similar flat stock of a length 14.5” x 26” (368 x 660 mm). The platform must first be secured to the table surface during cutting and cause injury.
- Mount the 14.5” x 26” (368 x 660 mm) platform to the saw using four 3” (76.2 mm) long flat wood screws through the holes in the base plate (Fig. 19).
CUTTING PLASTIC PIPE OR OTHER ROUND MATERIAL
Plastic pipe can be safely cut with your saw. It should be cut just like wood and CLAMPED OR HELD FIRMLY TO THE FENCE TO KEEP IT FROM ROLLING. This is extremely important when making end cuts.
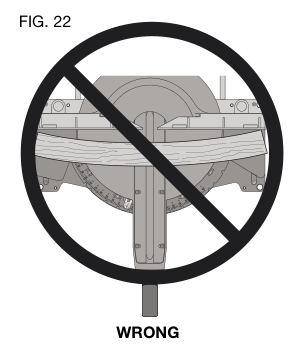
OUTING LARGE MATERIAL
If this occurs, simply realign your work on the table beneath the blade guard.
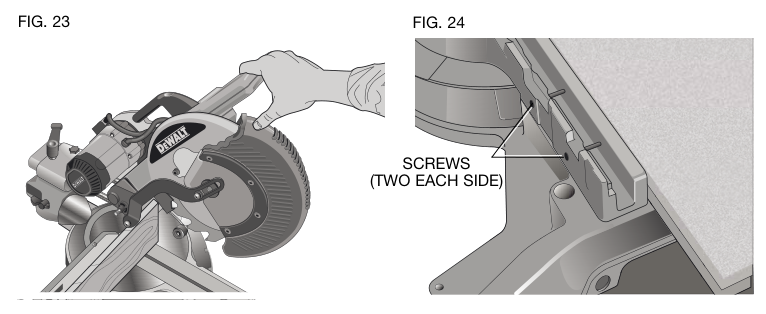
- If your compound is that heavy, as shown in Figure 20.
- Always adjust it as much as is necessary.
SAFETY SET UP FOR HEDGE CROSSES
You can set your width to 1/6” (406 mm) whenever a special setup is used to mount the saw up for fence workpieces, following these steps:
- Remove both left and right sliding fences from the saw and set aside.
- Make the necessary adjustments and reattach the fences and clean the fence outward. Adjust and reposition to confirm smooth cuts later.
MAINTENANCE
- DO NOT USE lubricants or cleaners (particularly spray or aerosol) on the cutting edge.
- All bearings are sealed. They are lubricated for life and need no further maintenance.
- Regularly clean the blade and base to ensure optimal performance.
SERVICE INFORMATION
Please have the following information available for all service calls:
- Model Number:
- Type Number:
- Serial Number:
DEWALT will repair, without charge, any defects due to faulty materials or workmanship for three years from the date of purchase. This warranty does not cover failure due to normal wear or toeyrause.
90 DAY MONEY BACK GUARANTEE
If you are not completely satisfied with the performance of your DEWALT Power Tool, Laser, or Nail Gun for any reason, you can return it within 90 days from the date of purchase with a receipt for a full refund – no questions asked.
PATENT NOTIFICATION
This product is protected under the following U.S. patents:
- 6,823,765
- 6,101,914
- 5,907,897
- 5,375,495
- 6,181,760
- 6,035,754
- 5,862,734
- 5,285,708
- 6,520,059
- 6,032,683
- 5,582,089
- 5,199,343
Troubleshooting Guide
BE SURE TO FOLLOW SAFETY RULES AND INSTRUCTIONS
| TROUBLE | WHAT’S WRONG? | WHAT TO DO |
|---|---|---|
| Saw will not start | 1. Saw not plugged in 2. Fuse blown or circuit breaker tripped 3. Cord damaged 4. Brushes worn out | 1. Plug in saw. 2. Replace fuse or reset circuit breaker. 3. Have cord replaced by authorized service center. 4. Have brushes replaced by authorized service center or replace them yourself. |
| Saw makes unsatisfactory cuts | 1. Dull blade 2. Blade mounted backwards 3. Saw or pitch on blade 4. Incorrect blade for work being done | 1. Replace blade. 2. Turn blade around. 3. Remove blade and clean with turpentine and coarse steel wool or household oven cleaner. 4. Change the blade type. |
| Blade does not come up to speed | 1. Extension cord too light or too long 2. Low house current | 1. Replace with adequate size cord. Refer to Use Proper Extension Cord under Important Safety Instructions. 2. Contact your electric company. |
| Machine vibrates excessively | 1. Saw not mounted securely to stand or work bench 2. Stand or bench on uneven floor 3. Damaged saw blade | 1. Tighten all mounting hardware. 2. Reposition onto level surface. 3. Replace blade. |
| Does not make accurate miter cuts | 1. Miter scale not adjusted correctly 2. Blade is not perpendicular to fence 3. A workpiece moving | 1. Check and adjust. Refer to Miter Scale Adjustment under Adjustments. 2. Check and adjust. Refer to Bevel Square to Table Adjustment under Adjustments. 3. Clamp workpiece securely to fence or glue 120 grit sandpaper to fence with rubber cement. |
| Material pinches blade | 1. Cutting beveled material | 1. Refer to Bowed Material under Special Cuts. |
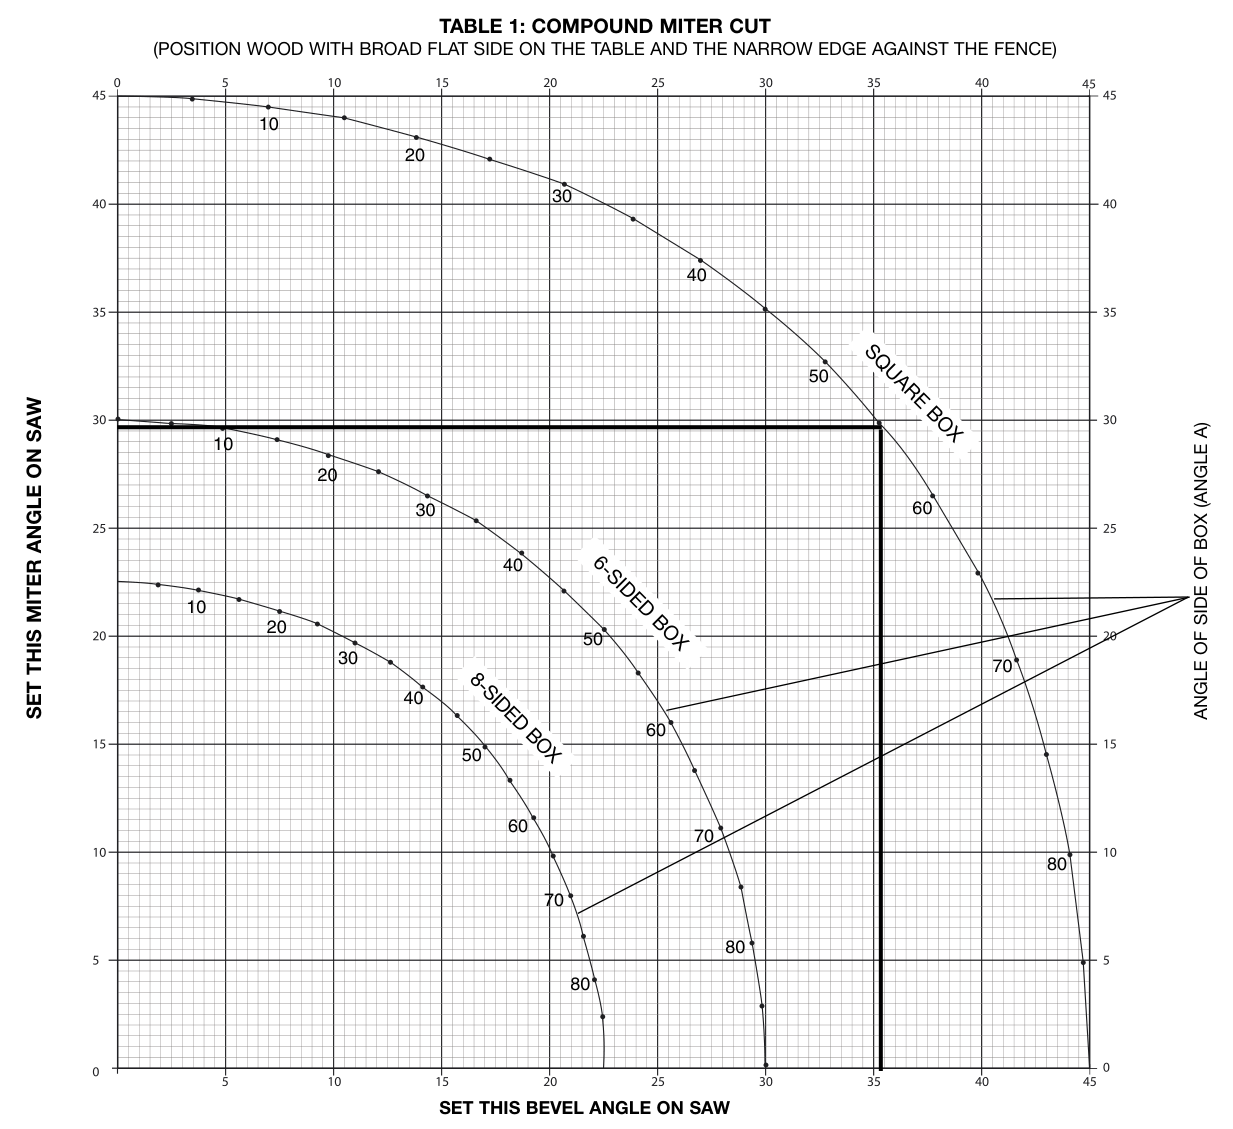
TABLE 1: COMPOUND MITER CUT
(Position wood with broad flat side on the table and the narrow edge against the fence)
